The car has covered another 120 thousand km — it is time to replace the fuel injection pump and timing belts. The sequence of works described in this article is suitable for AXL, AJT, ACV, AXG, AHY, AYY, AYC, AUF engines.
The main distinguishing feature of all engines of different years of production was the sequence of work with body parts at the initial stage of disassembly. A special set of attachments for powerful versions of 111 kW (152 hp), but they are rare and differ only in a different (full-size) intercooler, a different V-belt drive system, an air conditioner radiator, a variable geometry turbine and a different layout of the intake system (AHY and AXG engines).
Necessary tools and equipment
To perform a quality belt replacement, you will need the following tools:
- tension roller key 32;
- crankshaft pulley lock;
- key for fixing the fuel injection pump gear pulley;
- camshaft pulley locking key;
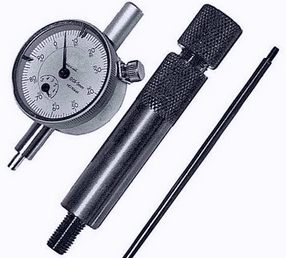
- clock indicator with holder;
- measuring probe;
- mounting strip;
- torque wrench range 100-200 Nm, 20-60 Nm.
All work will be carried out in a pit, so the car should be positioned so that the right wheels are as close to the edge as possible, this will ensure ease of work.
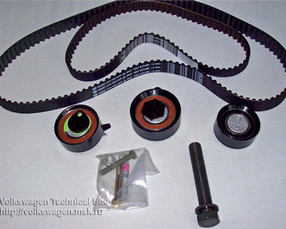
What spare parts are needed for the job?
How to replace timing belts and fuel injection pump on Transporter 2.5?
You can start working as soon as the engine has cooled down.
First of all, you need to remove the timing belt and fuel injection pump belt.
We shoot:
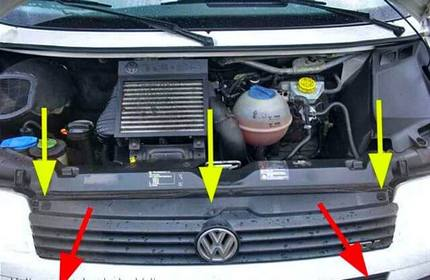
- Radiator grille.
- Insulating tray.
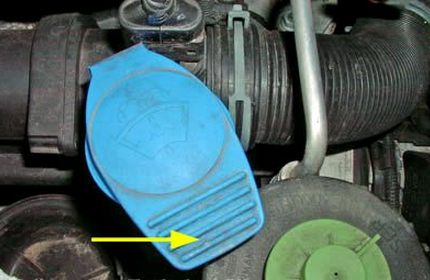
- Flow meter connector.
- Washer reservoir extension.
- Intercooler bracket.
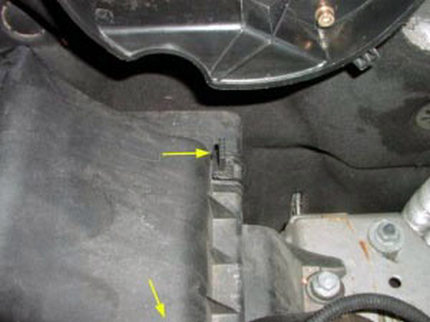
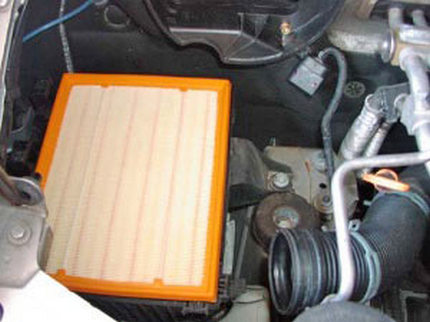
- The air filter cover and the cabin filter housing must first be removed from the supply air duct.
- We fold the radiator frame forward together with the radiator.
- Turn the wheels to the right until they stop.
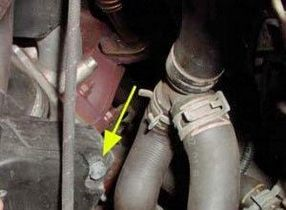
- In the upper left part of the radiator we find and disconnect the clamp of the power steering pump hose, the ends of the tube need to be plugged with suitable plugs
- We push the stoppers out of the radiator frame fasteners and then disconnect them.
- We move the frame with the radiator to the right (there is no need to disconnect the cooling system hoses), and secure it with wire to prevent it from falling.
- We remove the protective covers of both belts, and also remove the cylinder head cover.
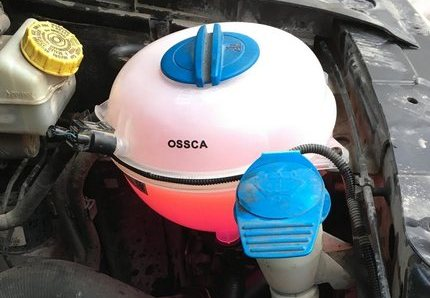
We release the pressure in the cooling system, open and close the expansion tank cap. The cooling liquid needs to be drained, in advance you need to find a container with a capacity of 8-10 liters.
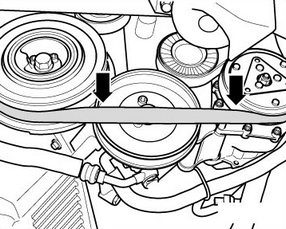
- On the power steering pump pulley, loosen the M8 bolts (3 pcs.).
- We take hold of the poly V-belt with both hands on the left and right of the power steering pump and slowly begin to pull the belt with our hands, gradually increasing the force (the belt must be pulled in the direction of the arrow), then remove the belt from the power steering pump and the remaining pulleys.
- We remove the power steering pulley and the intermediate rollers of the V-belt.
- We set the crankshaft to TDC of cylinder 1.
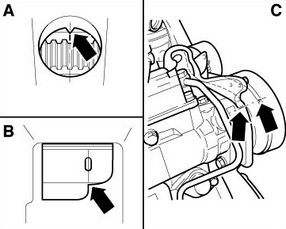
The marks on the fuel injection pump pulley/bracket C and the flywheel/clutch housing A (manual transmission) or the driven disk/clutch housing B (automatic transmission) must match. If all the marks do not match, then the crankshaft must be turned one revolution clockwise.
- We fix the crankshaft and unscrew the central bolt, remove the crankshaft pulley damper.
Attention! The tightening force is quite high, to avoid injury it is necessary to use a high-quality tool and reliable fixation methods!

- We unscrew the central bolt of the vibration damper.
- Loosen the bolts securing the vibration damper to the toothed pulley (M8 bolts) and unscrew the two bolts located opposite.
- We unscrew the two remaining mounting bolts enough to make it possible to disconnect the torsional vibration damper from the lower crankshaft gear by lightly tapping the bolt heads with a hammer.
- We remove the torsional vibration damper.
- We unscrew the camshaft bolt using a counter support (3-5 turns).
- Using a hammer and a punch, knock the gear off the camshaft cone through the hole in the timing belt casing.
- We unscrew the two bolts securing the internal plastic timing belt guard.
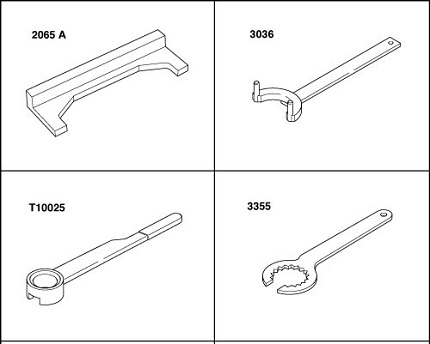
- The camshaft gear on the fuel injection pump side is fixed with a special key (3036), the bolt is unscrewed by 3-5 turns.
- We unscrew the tension roller of the fuel injection pump belt, remove the fuel injection pump belt, as well as the gear from the camshaft on the fuel injection pump side.
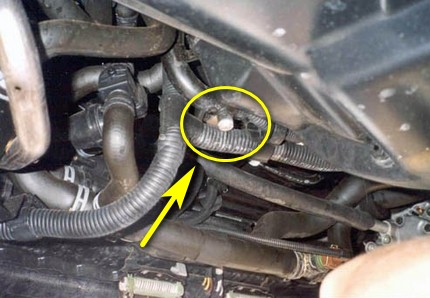
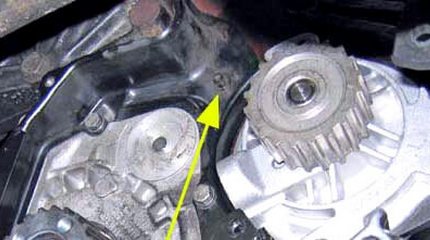
- We remove the far roller of the fuel injection pump and check the recession of the stud in the cylinder head housing.
- We unscrew the four bolts securing the oil filler neck.
- Remove the valve cover, first you need to unscrew the four 13 bolts.
- The lower part of the timing belt cover is removed.
- We mark the direction of the toothed belt (it is necessary to mark only if its replacement is not planned).
- We unload the tension roller of the toothed belt using a 32 mm open-end wrench. First, we need to unscrew the 13 mm mounting bolt and remove the roller.
- We remove the timing belt.
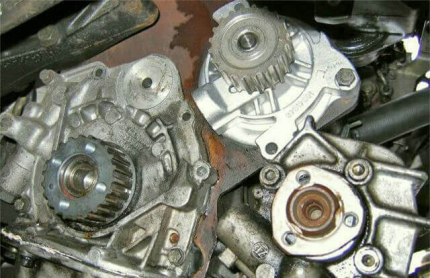
- We unscrew the three bolts securing the pump and remove it.
- The internal plastic timing belt guard is removed.
The engine is disassembled, we begin preparatory work.
Installing fuel injection pump and timing belts
Before starting to install the belts, pump and rollers, we set the injection advance. The work is performed in the following order.
- We unscrew the 12 mm plug from the fuel injection pump housing and screw in the adapter for the dial indicator instead of the threaded plug.
- We insert a dial indicator into the adapter (approximate measurement range 0… 3 mm) with a preload of approximately 2.0 mm.

- We check whether the marks on the fuel injection pump body and the pulley match.
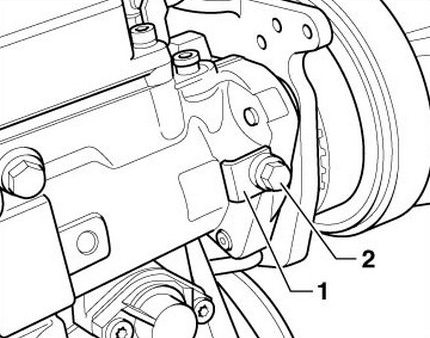
- Loosen the fixing bolt (2) on the high-pressure fuel pump.
- Remove the spacer (1).
- We set the indicator to “0”.
- To make sure that the injection pump plunger is at BDC, smoothly turn the injection pump pulley using a 21 mm open-end wrench (clockwise). As soon as the dial indicator arrow stops moving, BDC has been reached, set the dial indicator to “0”.
- Slowly rotate the fuel injection pump drive pulley with a 21 key; rotate it counterclockwise until the dial indicator arrow moves 0.55 mm.
- Fixing bolt 1 on the high-pressure fuel pump is tightened to a torque of 30 Nm.
- We remove the dial indicator and screw a plug into the hole.
- We check whether the TDC mark on the flywheel coincides with the original mark.
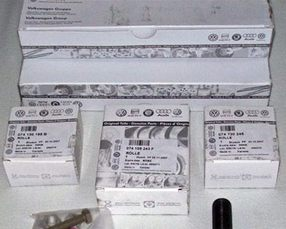
I chose the original replacement kit.


Installing the timing belt and pump
While everything is disassembled, you can look at the condition of the camshaft seals and the front crankshaft seal.
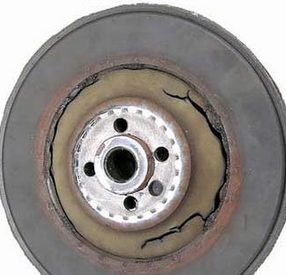
All metal and plastic parts have been washed.
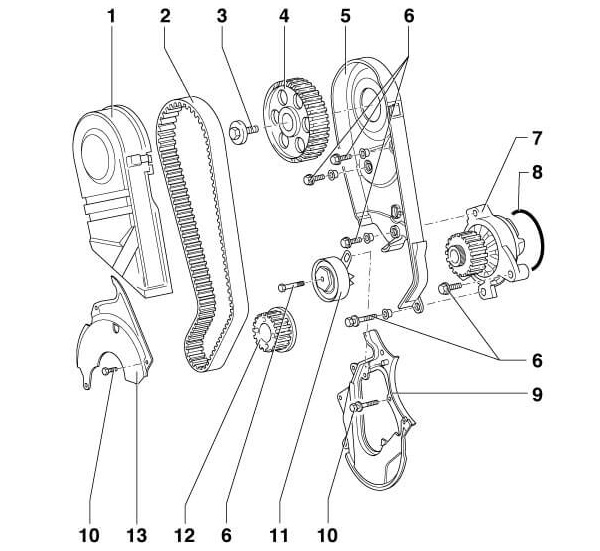
1 – upper toothed belt casing; 2 – toothed belt; 3 – fastening bolt (80 Nm); 4 – camshaft toothed wheel; 5 – rear toothed belt guard; 6 – 10 Nm bolt; 7 – water pump; 8 – ring; 9 – lower casing; 10 – casing fixing bolt; 11 – tension roller; 12 – toothed belt gear; 13 – casing.
Let’s start assembling:
- We check whether the TDC mark on the flywheel matches the original mark.
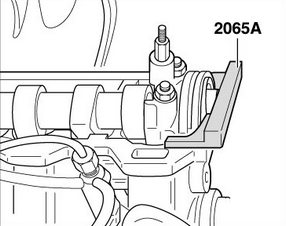
- We fix the camshaft using a template (2065 A).

- Insert a feeler gauge into the camshaft slot (usually = 0.40 mm)
- Let’s start installing:
a) the pump – before installing it on the rubber ring, it is advisable to apply a small layer of sealant for safety, then we screw on three bolts to center the pump; you only need to tighten the right bolt, remove the other two.

b) the inner timing belt cover — screw on the two bolts that secure both the pump and the guard; use a thread locker to secure the two upper bolts that secure the guard to the head.
c) the camshaft gear — tighten the mounting bolt by hand; check for distortions and for free rotation of the toothed pulley.
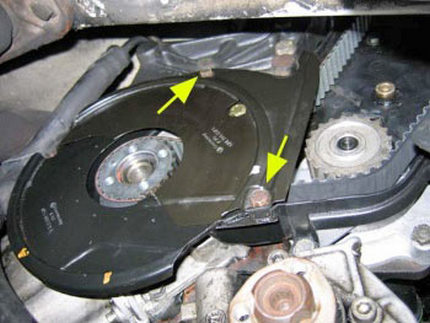
d) install the tension roller (1) so that the tongue (2) of the tension roller enters the locking pin of the lower part of the belt cover.
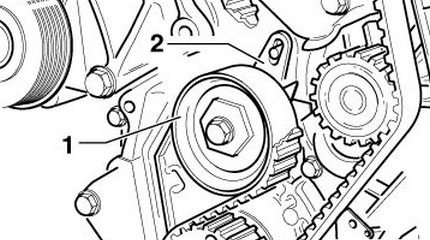
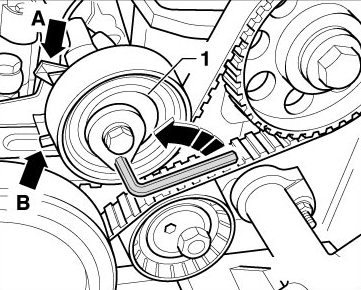
d) Put on the timing belt, starting from the crankshaft. 1. Tighten the tension roller mounting bolt.
1. To tighten the timing belt, turn the roller clockwise, the right edge of the indicator (A) should coincide with the right edge of the indicator (B).
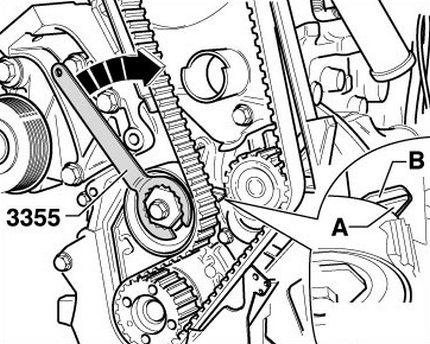
- Tighten the tensioner roller mounting bolt to a torque of 20 Nm.
- We check whether the crankshaft remains at TDC of cylinder 1; if necessary, we make adjustments.
- Tighten the camshaft pulley mounting bolt using the support (3036); do not forget that you must first take into account the strength of the bolt: 8.8 = 85 Nm, 10.9 = 100 Nm.
- Remove the template (2065 A) from the camshaft.
- We install the lower belt cover.
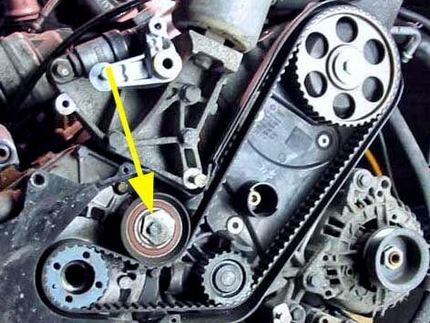
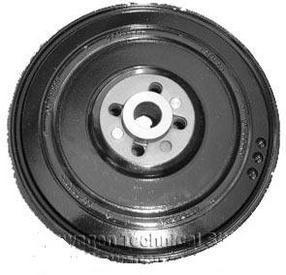
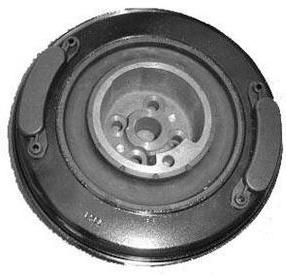
- We install a torsional vibration damper.
- Install the support (T10025) and tighten the central bolt of the pulley damper (crankshaft torque 160 Nm). The final turn is carried out in two steps – 90 degrees each. It is advisable to lightly lubricate the threads with engine oil and the head of the central bolt.
- We turn the crankshaft two revolutions in the direction of engine rotation so that the crankshaft returns to TDC of cylinder 1.
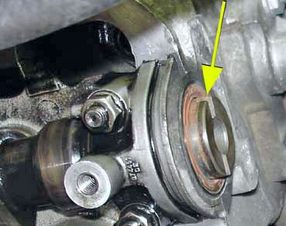
ATTENTION! The diamond washer is installed between the damper and the crankshaft gear. - We re-check the position of the tensioner roller indicator. If the right edges of the indicators -A- and -B- do not match, then we repeat the tensioning process.
- We close the outer timing belt cover.
- We install the valve cover.
- Screw on the oil filler neck.
Installing the fuel injection pump belt
- We check whether the original mark coincided with the TDC mark on the flywheel.
- We install the belt on the fuel injection pump pulley.
- We insert the belt into the fuel injection pump pulley and secure the camshaft pulley; later the pulley will need to be turned.
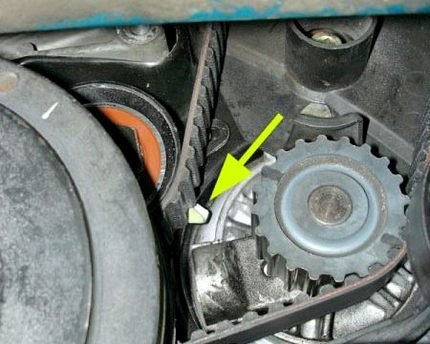
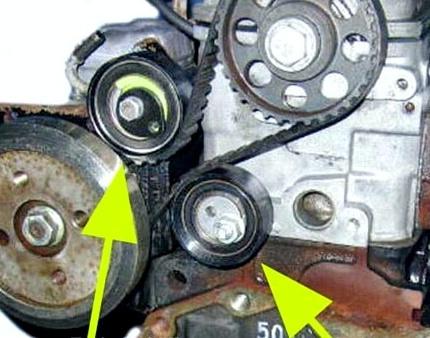
- We check the installation position of the guide roller:
- We turn the guide roller so that the pointer coincides with the contour of the cylinder head flange.
- Tighten the nut (2) to a torque of 20 Nm.
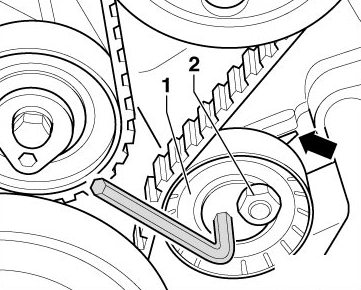
- Install the tension roller (1) so that the tension roller tongue fits into the console recess (arrow B). Tighten the mounting bolt.
- To tension the toothed belt, turn the tensioner roller counterclockwise to a position in which both indicators are opposite each other (arrow A).
- Tighten the mounting bolt to a torque of 15 Nm.
- Tighten the fuel injection pump pulley fastening nut to a torque of 160 Nm. Use support -3036-. Make sure that when tightening, the torque is not transferred to the fuel injection pump pulley fixed in the feed start position.
- Loosen the fixing bolt (2) on the high-pressure fuel pump.
- We install the spacer (1) and tighten the fixing bolt to a torque of 12 Nm.
- We turn the crankshaft two revolutions so that it reaches TDC of cylinder 1.
- We check the position of the marks on the fuel injection pump tension roller (arrow A). If positioned correctly, the indicators will be opposite each other. A slight shift of the front indicator is acceptable, but the indicator should never go beyond the contour of the plate on which the rear indicator is located. If the front indicator goes beyond the contour of the second plate, the tension will have to be repeated.
- We install the fuel injection pump belt guard.
We also install all the previously removed parts, fill in the coolant, start the engine, after starting, you need to check all connections for fluid leaks, put in an insulating pan and you can go.